Contents
If you are a Windows 7/ 10 user and want to upgrade your pc to the latest version of Windows 11, then this page is completely designed for you. Here we will guide you on how to update your old Windows version to Windows 11. Also, we will share the important information you should know before upgrading your Laptop to the latest Windows v9ersion. We will share the minimum requirement of your system. Everyone can upgrade to Windows 11 from a previous version of Windows. The cost of upgradation is totally free. But there are some conditions set by the Microsoft team that should meet then only you could able to update your Windows to Windows 11.
Microsoft Windows 11: Check System Requirement
Before updating your system Windows version you must check your PC system information. If your PC stands close to the following system configuration then you can able to upgrade your old windows to the new version.
| Processor | 1 GHz or faster with 2 or more cores on a compatible 64-bit processor or System on a Chip (SoC). |
| RAM | 4 GB |
| Storage | 64 GB or larger storage device Note: See below under “More information on storage space to keep Windows 11 up-to-date” for more details. |
| Firmware | UEFI, Secure Boot capable. Check here for information on how your PC might be able to meet this requirement. |
| TPM | Trusted Platform Module (TPM) version 2.0. Check here for instructions on how your PC might be enabled to meet this requirement. |
| Graphics card | Compatible with DirectX 12 or later with WDDM 2.0 driver. |
| Display | High definition (720p) display that is greater than 9” diagonally, 8 bits per colour channel. |
| Internet connection | Requires internet connectivity |
| Microsoft account | Windows 11 requires a Microsoft account for some features. |
Everyone is aware of the above system configuration terms I used above but you might be wonder what is TPM and how you can check the TPM of your system. Firstly TPM stands for Trusted Platform Module and It is an international standard for a secure cryptoprocessor. It provides some necessary features to your systems like BitLocker Drive Encryption, Windows Hello PINs and biometrics, and PC hardware tamper protection.
Also, check out: Apple iPhone 13 Models Detailed Comparison, Specs
Also, check out: iPhone 13 Series Price Comparisons: Check Country-wise Price List: India, US, Australia, Canada, UAE
How to Check TPM Chip Version
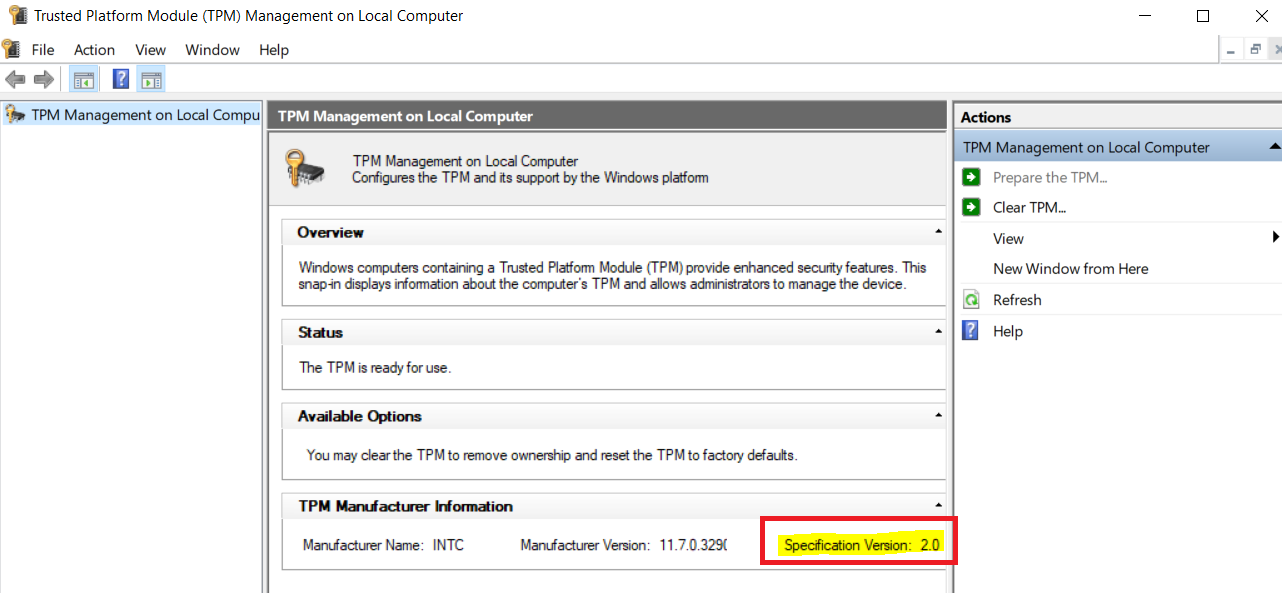
To check TPM of your PC, you have to Open RUN by pressing the Windows + R Key. Then type tpm.msc and hit Enter on your keyboard. Now you can successfully able to see your TPM version.
Also, check out: Free Fire Redeem Code Today [100% Working] Garena FF Reward Codes 2021
Also, check out: PUBG Redeem Code Today [100% Working] PlayerUnknown & Battlegrounds
It is recommended that you should require Trusted Platform Module 2.0 version to install windows 11, However, Microsoft said that the TPM 1.2 version is sufficient to run the Windows 11 version.
In case you are unable to check your System TPM version, you have to manually turn on this feature from your BIOS. To enable it, go to the BIOS setting try to find an option that says TPM or PTT (Platform Trust Technology), usually found under an Advanced section somewhere. Once the TPM option is turned on, you can easily check for your TPM version again by pressing the Windows key + R and search for ‘tpm.msc’, and hit the OK button.
Now after checking everything let’s start the steps to Upgrade your Windows 10 to Windows 11.
Step to Upgrade Windows 10 to Windows 11
If you have already the Geniune version of windows 10 on your PC then the upgrade process seems to be very easy. You do not have to visit a third-party website. You can upgrade your Windows 10 to a brand new WIndows 11 free of cost by doing the following steps. In each step, we have provided the screenshot for reference purpose which make installation guidance more convenient.
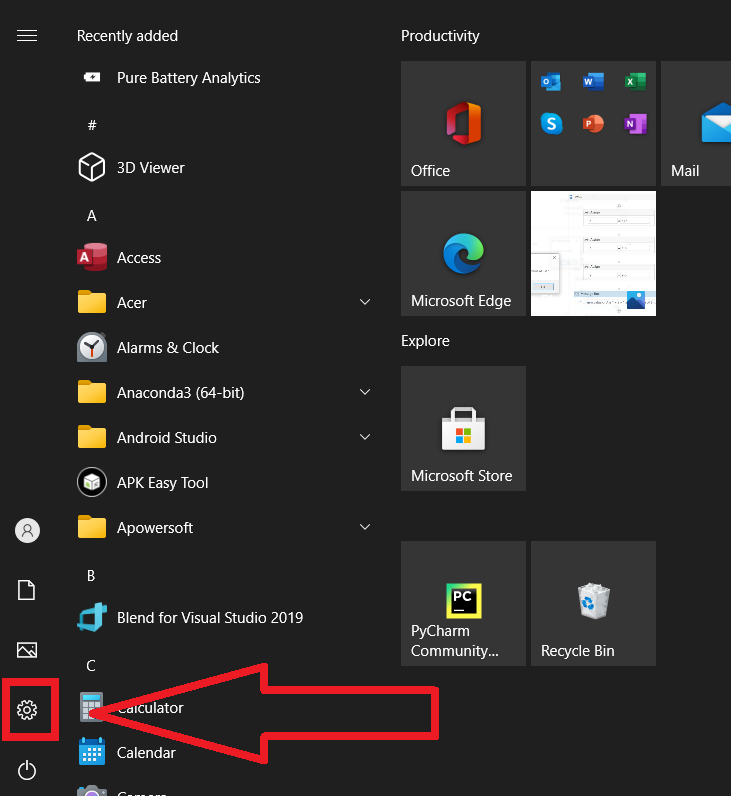
- In the first step, Make sure your Laptop is connected to a power source or you must have at least 40 per cent of your battery, Now go to the Start menu or simply press the Windows key on your keyboard. Now select the Setting option as shown below:-
- In the next step, you have to select the Updates and Security option from the setting page.
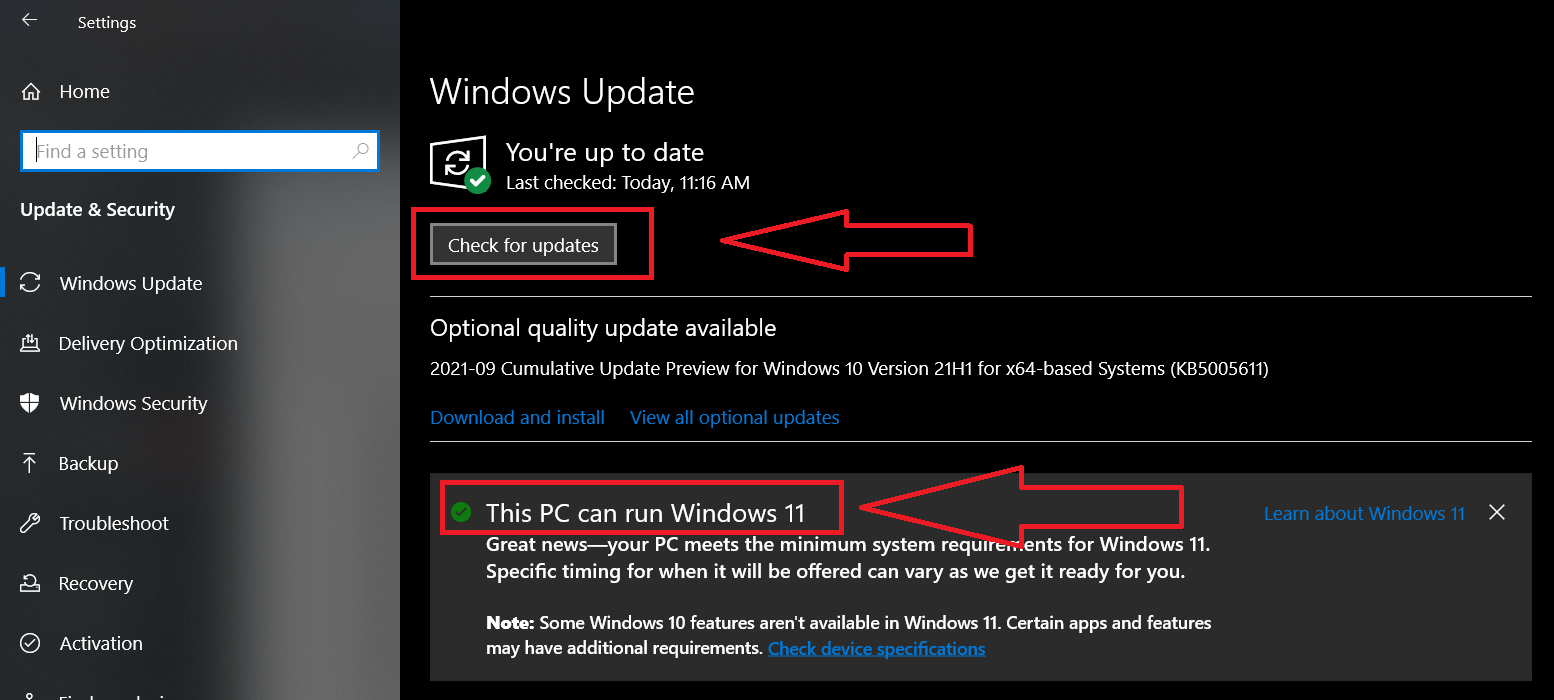
- In the new window, you will find the Check update option. Make sure you are connected to a good internet connection before clicking on the Check update option.

- Now Click on the Check updates button. Microsoft also shows you whether your PC support windows 11 update or not.
- Now Microsoft will show you a list of old pending updates. Do select all the necessary pending Updates.
- In the last step, you can find a file of Windows 11 in the list of the detected update by Mircosoft. Finally, Click on the download and install button. This might be consuming your heavy internet usage and also might be asked for a reboot. It is recommended to take the backup of important files from your PC.
Important Note: In case, you have not found the windows 11 name in the update list you have to download the official Microsoft Windows 11 Installation Assistant and simply install it and it will upgrade windows 11 easily.
Download Windows 11 Installation Assistant: Get Now
The above method is the same for windows 8 upgrade to windows 11.
Step to Upgrade Windows 7 to Windows 11
As we know the Microsoft has discontinued the support for windows 7. So it is strongly recommended to all the users of Windows 7 to upgrade it to the latest version of Windows, Windows 11 is a complete package full of security and features. Before proceeding to the guides on ‘How to upgrade from windows 7 to windows 11’ i would like to request to take a backup of all the important files from your system. Also, make sure you have a good internet connection and your system is connected to the power cord.
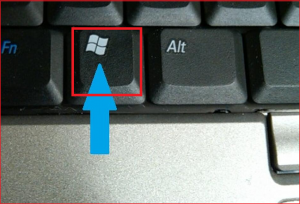
- Go to Start Menu by pressing the Windows key on your keyboard.
- Now go to the Control panel.
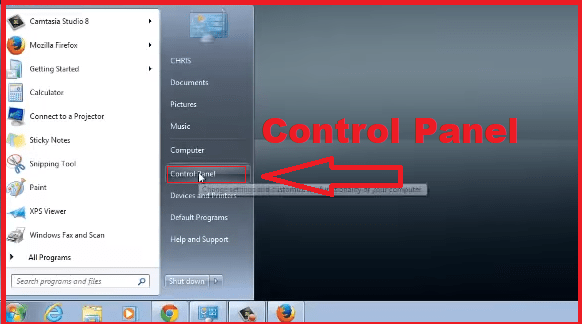
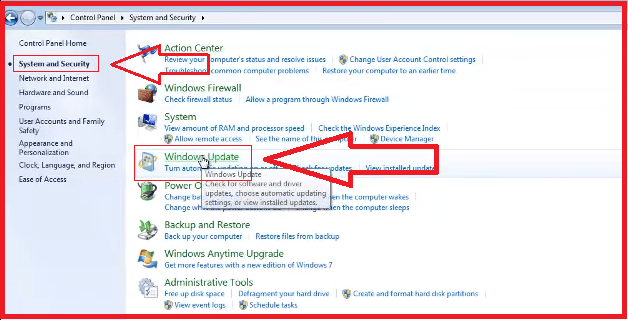
- Click on the Windows Update green button.
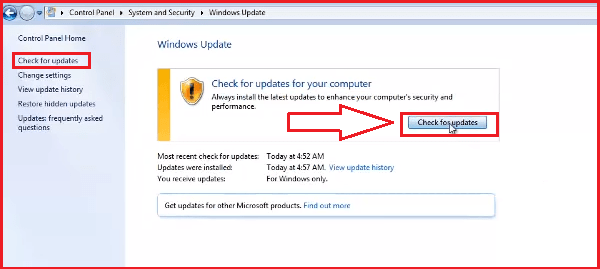
- Now Click on the Check for Updates button.
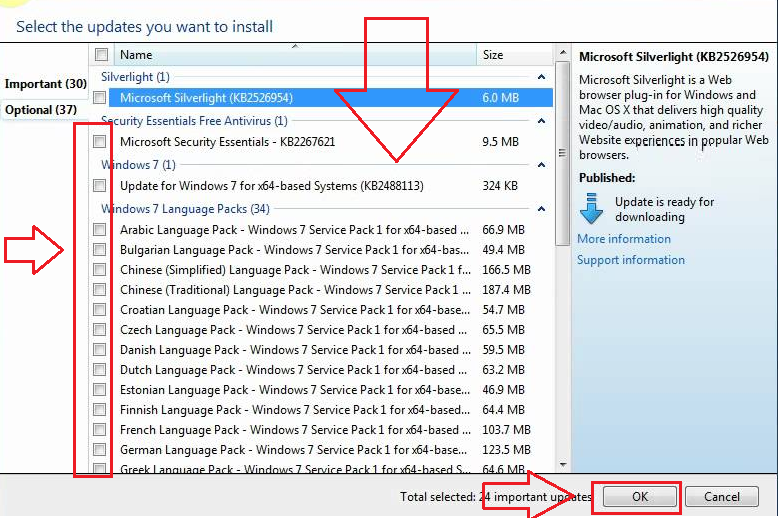
- After checking for updates you can select the New version of the windows from the Important updates are available and optional updates are available button. Moreover, you can simply press the Install updates button also.
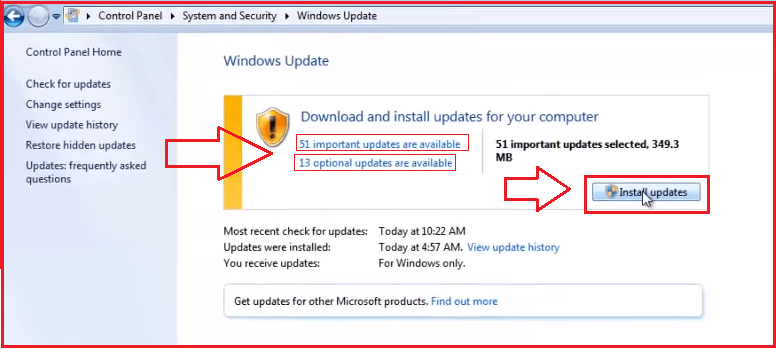
- Now you can see from the list of updates. If Windows 11 is present in the list just click the update and hit the OK button then press the Install Updates button.
Important Note: In case, you have not found the windows 11 name in the update list you have to download the official Microsoft Windows 11 Installation Assistant and simply install it and it will upgrade windows 11 easily.
Download Windows 11 Installation Assistant: Get Now
Also check out: Gmail.com: How to Login or Create New Gmail Account
Also, check out: Gmail Forgot password: Steps to Reset or Change Google Account Login Credentials
Congratulation, finally you have installed windows 11 on your system. If you are facing any error while upgrading feel free to ask us in the comment box with your error code. We will try our best to respond asap.
